Table of Contents
We were overwhelmed with the response to our previous tutorial on how to draw an elephant, so we decided to create another one for you all 😊. However, this time we will teach you how to draw a more realistic and life-like elephant which is still easy and simple enough for beginners.
The best way to start when drawing a life-like representation of an elephant is to look at reference pictures. Beginners are often reluctant to use a reference, because it can feel like cheating. However, even professional artists lean on references when studying new figures and objects.
You can’t draw accurately something if you don’t have a detailed image of it in your mind, so this is where it’s useful to look at pictures and try to learn from them.
1. Find A Good Reference
So, the first step is finding a useful reference. Not all pictures will help us in the process of taking apart each of the different shapes that make up the elephant. For example, this following photo of an African elephant may seem like a good reference for a drawing at first but if we look at it closely, it is not.
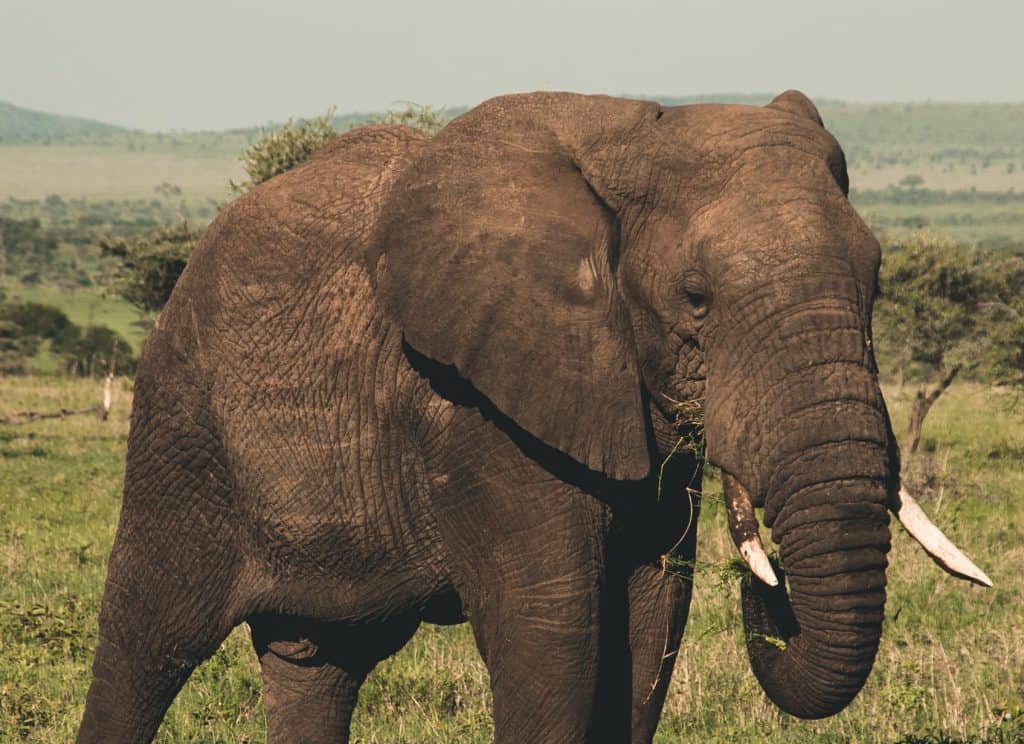
The elephant is lit uniformly, and the values of the shades and lights are too similar. This won’t help us identify volume and depth, and the final drawing will look flat or poorly shaded.
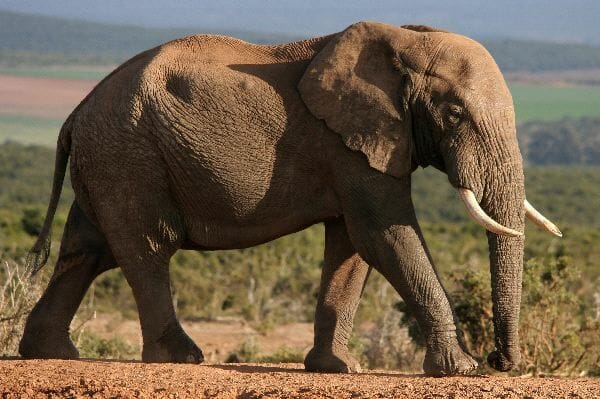
On the other hand, this following elephant image has much more contrast between lights and shades, and we can appreciate the roundness of shapes, which gives us a better understanding of the form. I’ll go with this one.
2. Identify the Basic Shapes of the Elephant
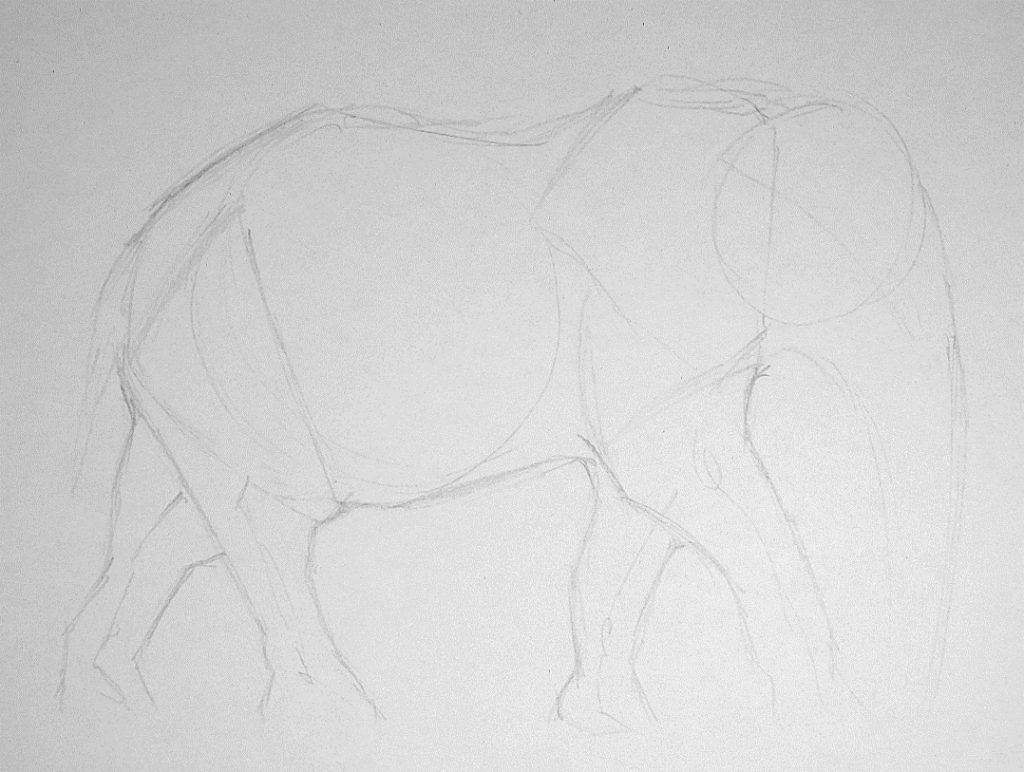
With fast and light strokes, try to define the shapes that make up the elephant’s body. The most obvious are a circular shape for the body and the head (red), and a trapezoid shape for the ear (yellow). It’s very useful to identify the angles made by the shoulder blade and humerus, and by the pelvis and femur (cyan). This will help us have in mind the way the legs join the body.
At this stage, you should also outline the general direction of the legs without getting into too much detail. Follow the gesture and identify the joints and where the leg changes direction. This step is to make sure all the proportions are set correctly from the start.
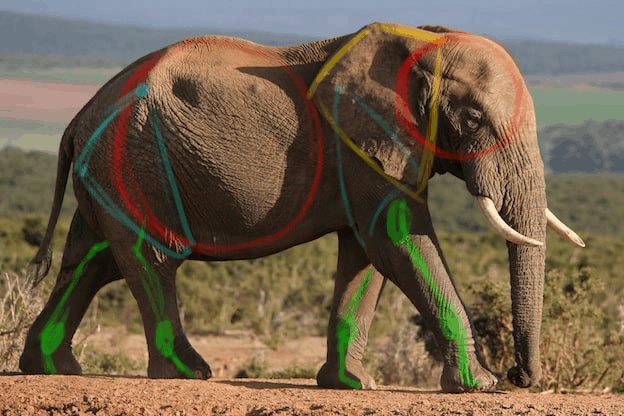
After this, if you connect all the shapes into one, you should have something similar to this:
3. Identify volumes. Shading and line weight.
Now that we have the object broken into different shapes, we should define the volumes. This is how we’ll make the elephant drawing look three dimensional. We identify the source of light (in this case, it comes from the upper right), and start applying shade where the light can’t reach.
You can use different techniques to shade, but in this case I’d recommend using crosshatching, as the skin of elephants is wrinkled and this type of shading will imitate that texture.
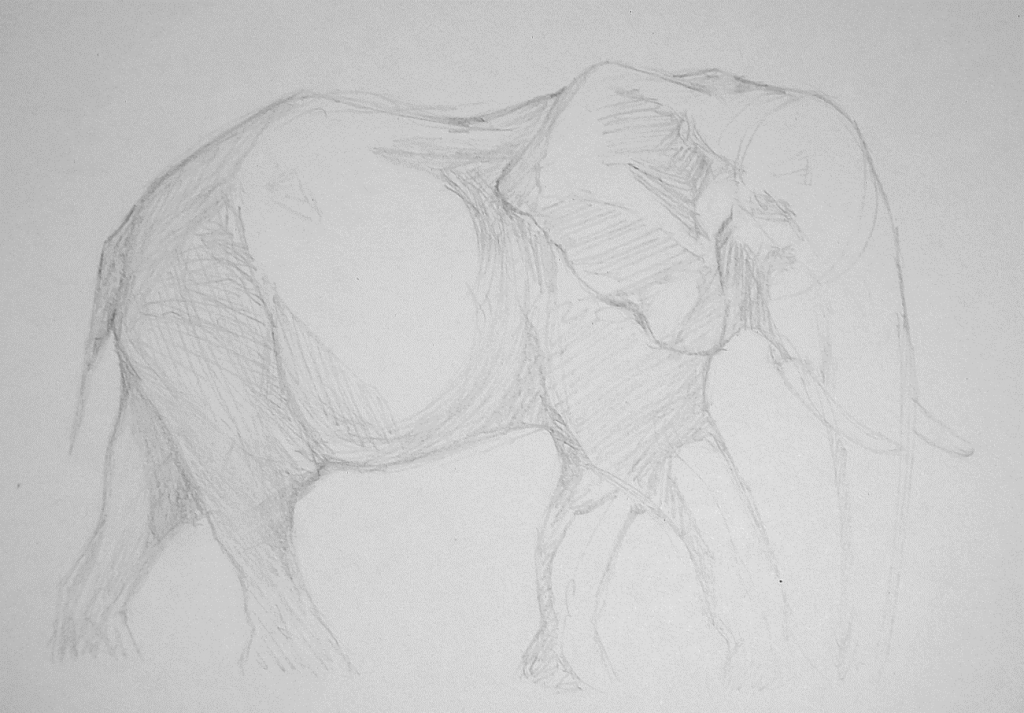
Along with the shading, you should start playing with the line weight. Notice where two different volumes join, and make the line darker or thicker. There isn’t a right way to line-weight your drawings, but with practice you’ll start noticing what looks right. It is particularly important that you vary the line thickness and pressure in the whole drawing, otherwise it will end up looking flat.
As a general rule of thumb, in places where the light falls directly, the line should be thinner and lighter (for example, look at the forehead). On the other hand, parts that are heavily shaded have often but not always, thicker and darker lines.
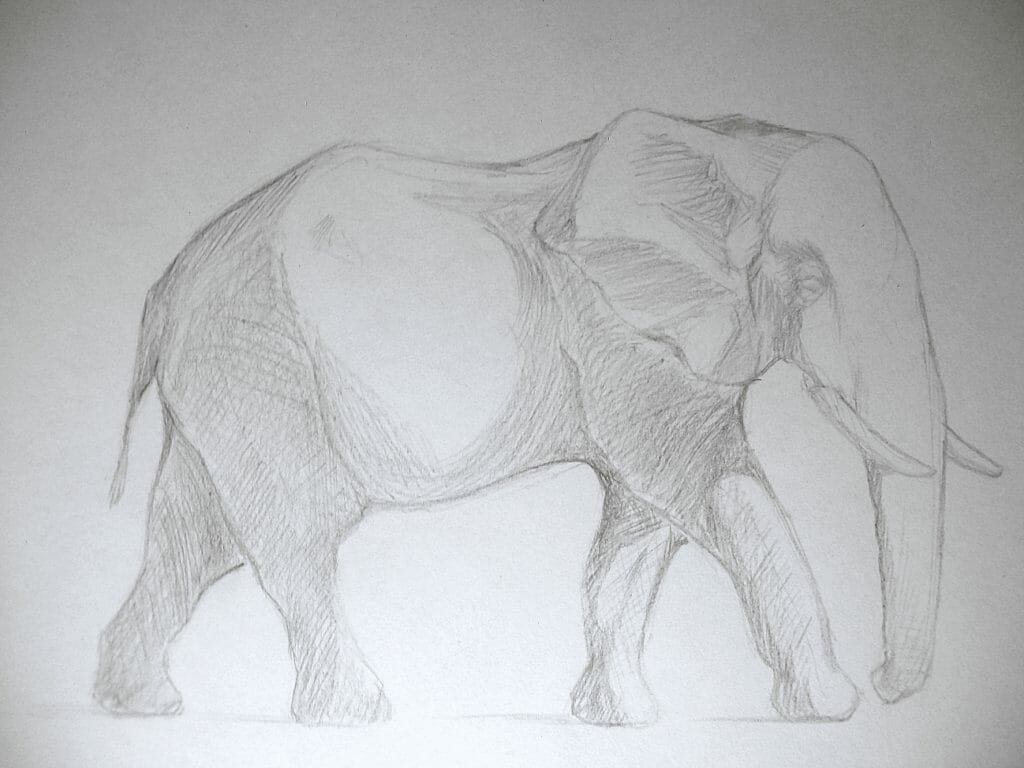
At this stage, you should have a drawing that looks 3D, but still lacks details and definition. On to the next step!
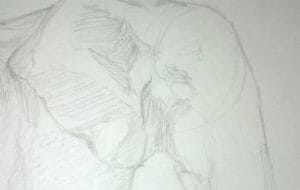
4. Adding Details and Where To Stop
Now that we have the shapes and volumes shaded, it’s time to start adding details. When adding details to your drawing of an elephant, it’s easy to get carried away. However, remember that less is more and adding too many things will make it looks overcrowded.
To avoid this, you shouldn’t be focusing on small details, like drawing every wrinkle, every eyelash, and so on. Instead, you should consider details as a whole. As mentioned before, crosshatching will make the skin look detailed enough.
For the eye, I simplified the shape by outlining a general form, adding the upper lid and then shading it to give it volume (don’t forget that eyes are spherical!)
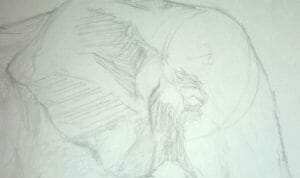
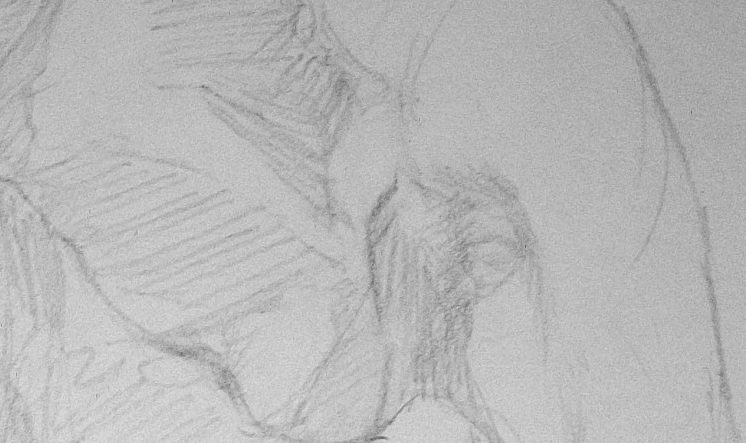
Now that we have this done, we are ready to add the finishing touches. With a darker pencil, go over the shadows and the thicker lines and overall consolidate everything you’ve done so far. Erase the sketch lines, and it’s done.

If you made it this far –🎉 🎉congratulations 🎉 🎉. We hope you managed to successfully draw an elephant, and we would love to see some of your attempts via email, social media or in the comments below. We will feature some of the best attempts, and may even offer some exclusive prizes to the best examples.
I LOVE ELEPHANTS!!!!!!!!!!!!!!!!!!!!!!!!!!!!!!!!!!!!!!!!!!!!!!!!!!!!!!!!!!!!!!!!!!!!!!!!!!!!!!!!!!!!!!!!!!!!!!!!!!!!!!!!!!!!!!!!!!!!!!!!!!!!!!!!!!!!!!!!!!!!!!!!!!!!!!!!!!!!!!!!!!!!!!!!!!!!!!!!!!!!!!!!!!!!!!!!!!!!!!!!!!!!!!!!!!